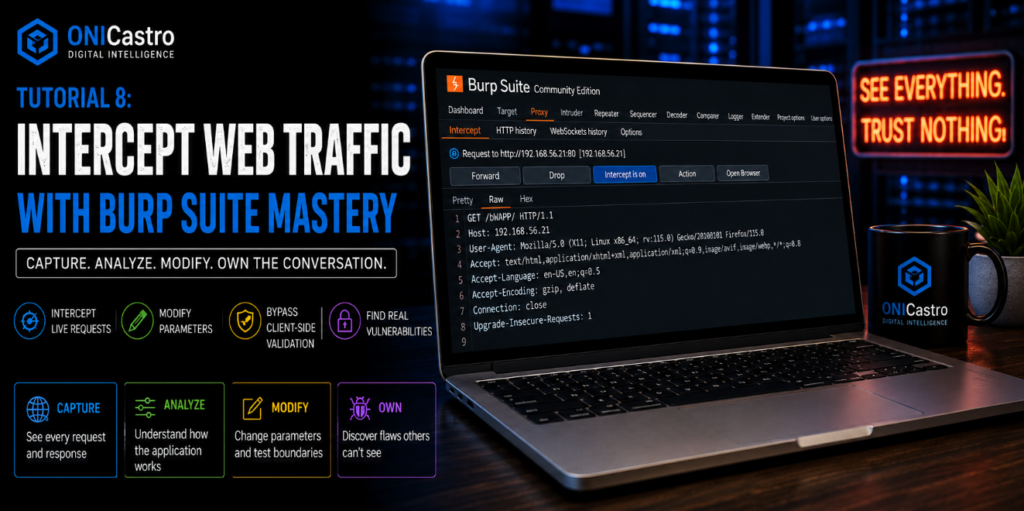
Tutorial 8: Intercept Web Traffic (Burp Suite Mastery)

Lesson notes
Welcome to Tutorial 8 of the Ethical Hacking & Cybersecurity Masterclass at ONICastro Digital Intelligence. This guide will teach you how to Intercept Web Traffic using Burp Suite, the industry-standard tool for web application penetration testing. Mastering the ability to Intercept Web Traffic is the single most important skill for any web application hacker.
Table of Contents
We are now entering Module 4: Web Application Penetration Testing.
Most modern enterprise systems are web applications. They operate on a simple model: a web browser (client) sends HTTP requests to a server, and the server sends HTTP responses back. Understanding this flow is essential before you can Intercept Web Traffic effectively.
To find vulnerabilities in a web application, you cannot rely on what the browser shows you. Developers often build security features inside the browser using JavaScript (like validating email formats or restricting ticket prices). This is client-side validation, and it is a massive security illusion. The only way to see the truth is to Intercept Web Traffic.
To bypass these restrictions, we use an Intercepting Proxy. The industry standard is Burp Suite.
Burp Suite sits in the middle between your web browser and the target server, allowing you to capture, read, and edit every single HTTP request on the fly before it ever reaches the server. When you Intercept Web Traffic, you control the conversation.
1. Setting Up the Burp Proxy to Intercept Web Traffic
Open your Kali Linux VM and start Burp Suite (it is in the top-left menu or run burpsuite in a terminal). Select a temporary project and start the tool. This is your first step to Intercept Web Traffic.
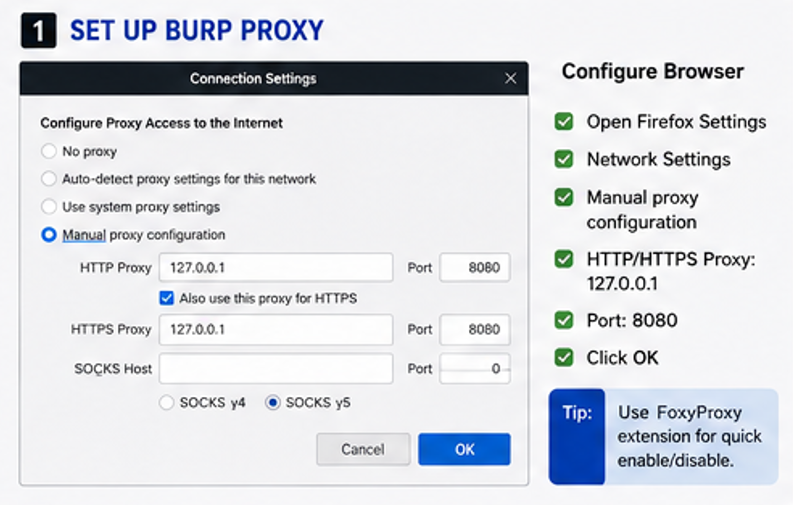
By default, Burp starts a local proxy listener on 127.0.0.1:8080. We need to configure our browser (Firefox) to send its traffic through this listener so we can Intercept Web Traffic.
Option A: Manual Firefox Settings (Standard)
- In Firefox, open the menu and go to Settings.
- Scroll to the bottom and find Network Settings. Click Settings.
- Select Manual proxy configuration.
- Set HTTP Proxy to
127.0.0.1and Port to8080. - Check “Also use this proxy for HTTPS”.
- Click OK. Your browser is now configured to Intercept Web Traffic.
Option B: FoxyProxy Extension (Professional)
Changing Firefox settings back and forth is tedious. Professionals use a Firefox extension called FoxyProxy Standard (pre-installed in Kali’s Firefox). This makes it effortless to Intercept Web Traffic on demand.
- Click the FoxyProxy icon in the toolbar → Options.
- Add a new proxy called “Burp” with IP
127.0.0.1and Port8080. - Click the extension icon and select “Burp” to route all traffic through Burp, or select “Turn off” for standard browsing. This toggle control is essential when you need to quickly Intercept Web Traffic.
2. Installing the Burp CA Certificate for HTTPS Interception
If you try to visit an HTTPS website (like https://google.com) through the proxy right now, Firefox will block you with a scary security warning. This is a hurdle you must clear to Intercept Web Traffic securely.
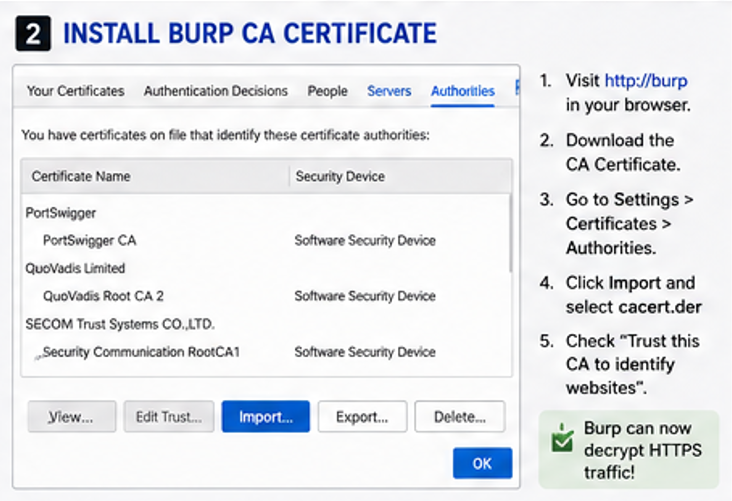
Because HTTPS encrypts traffic between the browser and the server, Burp cannot read or modify the requests unless it acts as a “Man-in-the-Middle” (MITM). It does this by decrypting the traffic using its own certificate. We must tell Firefox to trust Burp’s certificate to successfully Intercept Web Traffic.
- Ensure FoxyProxy is set to route traffic through Burp.
- In Firefox, navigate to
http://burp(this page is generated locally by Burp). - Click CA Certificate in the top-right corner to download
cacert.der. - In Firefox, open Settings, search for Certificates, and click View Certificates.
- Go to the Authorities tab and click Import.
- Select the downloaded
cacert.derfile. - Check “Trust this CA to identify websites” and click OK.
Firefox will now trust Burp, allowing you to Intercept Web Traffic over HTTPS without warning messages. This certificate trust is the foundation of
Unlock the Remaining 60%
Join the ONICastro Intelligence Hub — completely free.
Get full access to every tutorial and never lose your place.
- Learning Paths synced to your account
- Continue exactly where you stopped
- Completed badges & next recommended step
- Priority access to speedy consultancy